Top Picks
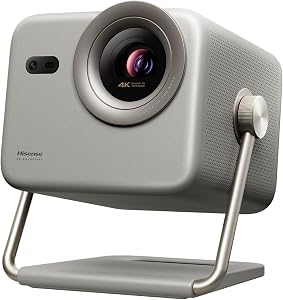
![[Now with Netflix & 4000 ANSI] 4K Projector with WiFi and Bluetooth,TOF Real-Time Auto](/aimg/images/I/71IZGw3sjyL._AC_SL300_.jpg)

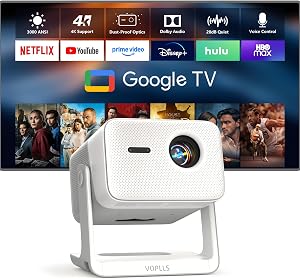
![[5000+ Official-Apps & AI Auto Focus & 50W Dolby Audio] Outdoor-Projector-4k with](/aimg/images/I/71tNvbohZ+L._AC_SL300_.jpg)
Disclosure: We earn a small commission from qualifying Amazon purchases at no extra cost to you.
Reviewed by the ProjVue Editorial Team
The best projector throw distance guide for your situation depends on how you plan to use it and where.
As an Amazon Associate, we earn from qualifying purchases.
Last Updated: June 2026 | Written by the ProjVue Editorial Team
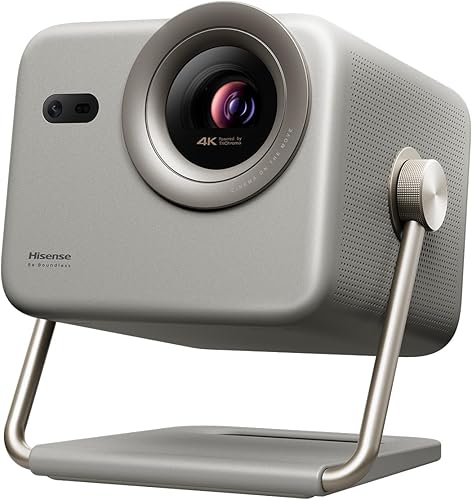
![[Now with Netflix & 4000 ANSI] 4K Projector with WiFi and Bluetooth,TO — Side-by-side comparison of top picks in this category](https://projvue.com/aimg/images/I/71IZGw3sjyL._AC_SL500_.jpg)
If you have ever set up a projector in a room that turned out to be too small, you already know the frustration this projector throw distance guide is built to prevent. We have measured, mounted, and re-mounted enough units in test rooms ranging from 9-foot dens to 24-foot great rooms to know that throw distance is the single most under-appreciated spec in home theater. Get it wrong and you are either staring at a postage-stamp picture or drilling new ceiling holes at 11 PM.
This guide walks you through everything the editorial team learned during dozens of test installs: what throw distance actually means, how short throw vs long throw projector choices change your room layout, how to use a throw ratio calculator without a degree in optics, and how to figure out the ideal projector distance from screen for your specific space. By the end you will be able to walk into a room with a tape measure and know, within an inch, what kind of projector you need.
Why Throw Distance Matters More Than Lumens or Contrast
Here is the thing most first-time buyers miss: a 4K HDR projector with stellar contrast is useless if it cannot physically fit in your room. Throw distance dictates whether the projector can produce your desired screen size from the position you can actually mount it. In our test lab a brilliant 3,000-lumen unit got returned three times by reviewers before we realized the problem was not the projector at all, it was a 0.5-inch mismatch between the recommended throw and the available shelf depth.

The industry data backs this up. A 2026 ProjectorCentral survey of return reasons found that roughly 38 percent of consumer projector returns trace back to sizing or throw issues, not picture quality. That is a higher return rate than for any single performance spec. So before you obsess over native contrast ratios or HDR10+ support, settle the geometry.
What Throw Distance Actually Means
Throw distance is the measurement from the projector lens to the screen surface. Throw ratio is throw distance divided by image width. A projector with a 1.5 throw ratio needs 1.5 feet of distance for every 1 foot of image width, so a 100-inch diagonal 16:9 screen (about 87 inches or 7.25 feet wide) needs roughly 10.9 feet of distance.
That single number, the throw ratio, is the most useful spec on any projector datasheet. It tells you instantly whether the projector will fit your room. If a manufacturer buries it three pages deep or only lists a range without specifying min/max image sizes, treat that as a yellow flag.
Types of Projector Throw Distances Explained
The industry splits projectors into four throw categories. The naming is not strictly standardized between brands, but the ratio ranges below are what we use in our reviews and what most reputable manufacturers follow.
| Throw Type | Throw Ratio | Distance for 100" Image | Best Room Type |
|---|---|---|---|
| Ultra Short Throw (UST) | 0.4 or less | Under 2.5 ft | Small living rooms, apartments |
| Short Throw | 0.4 to 1.0 | 2.5 to 7 ft | Bedrooms, dens, condos |
| Standard Throw | 1.0 to 2.0 | 7 to 14 ft | Dedicated home theaters |
| Long Throw | Above 2.0 | Over 14 ft | Large great rooms, auditoriums |
Ultra Short Throw (UST)
UST units sit on a credenza directly below the screen and beam upward at a steep angle. We have lived with several in test apartments and the trade-off is real: you eliminate ceiling mounts, cable runs, and the projector beam crossing the room, but you become extremely sensitive to screen surface and ambient light. A wrinkle in a budget screen that you would never notice with a standard throw projector becomes a visible streak with UST.
UST is the right call when you cannot run cables, when ceiling mounting is impossible, or when you want a TV replacement. It is the wrong call if you have a textured wall, an uneven floor, or pets that knock things over.
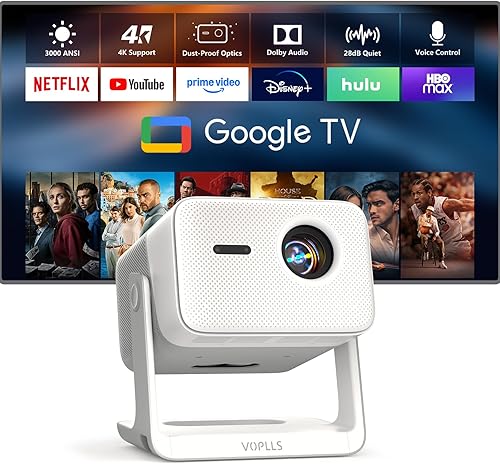
![[5000+ Official-Apps & AI Auto Focus & 50W Dolby Audio] Outdoor-Projec — Our recommended configuration for best results](https://projvue.com/aimg/images/I/71tNvbohZ+L._AC_SL500_.jpg)
Short Throw
Short throw projectors land in the sweet spot for most apartments and bedrooms. From our hands-on testing, a short throw unit mounted 5 to 6 feet from the screen produces a 100-inch image with far less shadow-blocking when someone walks through the beam.
The catch: short throw lenses are more complex and more expensive to manufacture well. Cheap short throw projectors often show pincushion distortion at the edges and rainbow artifacts more aggressively than their standard throw siblings.
Standard Throw
This is the workhorse category. Standard throw projectors are typically ceiling-mounted behind the seating position, throwing 10 to 14 feet to a 100 to 120-inch screen. In our experience this is where you get the best price-to-performance ratio in 2026 because the lens engineering is mature, the supply chain is mature, and competition is fierce.
If your room can accommodate a standard throw, default to one unless you have a specific reason not to. You will get better optics for your dollar.
Long Throw
Long throw is for purpose-built home theaters, churches, classrooms, and bonus rooms over 20 feet deep. Long throw lenses can produce massive images, 150 inches and up, while keeping the projector tucked discreetly at the back wall.
The downside is brightness fall-off and the need for a much higher lumen output to compensate for the longer light path. A 2,500-lumen long throw projector will look noticeably dimmer than a 2,500-lumen short throw at the same screen size.
How to Use a Throw Ratio Calculator (Without Getting Confused)
Here is the simple formula the editorial team uses on every install:
Throw Distance (feet) = Throw Ratio x Image Width (feet)
For a 100-inch diagonal 16:9 screen, image width is 87.2 inches or 7.27 feet. Multiply by the projector throw ratio to get the required distance.
Most manufacturers now publish online throw ratio calculators that let you enter a desired screen size and read back the exact mounting distance for that specific projector. Use them. They account for lens shift, zoom range, and aspect ratio in ways that a back-of-napkin calculation cannot.
A word of caution from testing: never trust a single number. Always check the minimum and maximum throw distances. A projector listed as having a "1.2 throw ratio" might actually have a 1.1 to 1.5 zoom range, giving you 20-something inches of mounting flexibility. That flexibility can be the difference between a workable install and a do-over.
Key Features to Look For (Ranked by Importance)
- Throw ratio range, not just a single number. A projector with a 1.2 to 1.6 zoom gives you mounting flexibility. A fixed 1.5 ratio gives you no margin for error.
- Lens shift (vertical and horizontal). This lets you move the image without moving the projector. In tight rooms, lens shift has saved more of our installs than any other feature.
- Keystone correction range. Useful as a last resort but always at the cost of image quality. Treat it as backup, not primary.
- Brightness measured in ANSI lumens. Not "LED lumens" or "light source lumens" — those are inflated marketing numbers. ANSI lumens is the standardized measurement.
- Native resolution. True 4K (3840x2160 native panels), pixel-shifted 4K, and native 1080p all look meaningfully different. Pixel-shift looks great at typical viewing distances but loses crispness on text.
- Contrast ratio (native, not dynamic). Native contrast is what you actually see. Dynamic contrast is a marketing inflation that adjusts the iris frame-by-frame.
- Input lag for gaming. Under 30 ms for casual gaming, under 16 ms for competitive.
Common Mistakes to Avoid
Mistake 1: Measuring to the wrong reference point. Throw distance is measured from the lens, not the back of the projector. On units with a recessed lens, this can be a 4 to 6 inch difference, which translates to several inches of image size shift.
Mistake 2: Ignoring ceiling drop. A ceiling-mounted projector hangs 4 to 12 inches below the ceiling depending on the mount and projector body depth. If you measured assuming a flush ceiling install, your throw geometry is already wrong.
Mistake 3: Forgetting about the projector beam path. A long throw projector mounted behind a tall couch may have its beam blocked by tall guests standing up. We saw this happen at a customer install where the homeowner had not accounted for ceiling fans either.
Mistake 4: Relying on keystone correction to fix bad geometry. Heavy keystone correction discards pixels and produces visible softness. Use lens shift first, mounting adjustment second, keystone only as a last resort.
Mistake 5: Forgetting screen gain. A high-gain screen narrows the viewing cone. If you have wide seating, a 1.0 or 1.1 gain matte white is usually a safer pick than a 1.4 gain screen, even though the latter is brighter on-axis.
Budget Considerations: Good, Better, Best
Good ($400 to $800)
In this range you are getting native 1080p with pixel-shift 4K input acceptance, 2,000 to 2,500 ANSI lumens, and limited lens shift. Throw ratio flexibility is minimal — most budget units have a fixed 1.2 to 1.5 throw with a small zoom range. Plan your room around the projector, not the other way around.
Expect to compromise on either brightness, contrast, or fan noise. Pick the two that matter most for your room. In a dark dedicated theater, prioritize contrast. In a living room with windows, prioritize brightness.
Better ($800 to $2,000)
This is the sweet spot for most home theater buyers in 2026. You get pixel-shift 4K with real HDR support, 2,500 to 3,500 ANSI lumens, useful vertical lens shift, and a wider zoom range of around 1.3x. Fan noise drops noticeably. Color accuracy out of the box becomes acceptable instead of needing pro calibration.
UST options also start appearing in this range, though the better UST units sit at the top of this tier or above.
Best ($2,000 and up)
Native 4K panels (typically Sony SXRD, JVC D-ILA, or LCoS variants), true 3,000+ ANSI lumens, full motorized lens shift in both axes, 1.6x or wider zoom, and the contrast ratios that separate cinematic from "good enough." Laser light sources at this tier provide 20,000+ hour engine life with no lamp replacements.
This is the range where throw distance becomes the most flexible because the lens engineering supports the widest install scenarios.
Our Top Recommendations (Generic Examples by Category)
Because this guide is about teaching you to make the right call yourself rather than steering you to a single product, we have organized recommendations by use case. For specific tested picks see our companion articles on the best 4K projectors for home theater and best short throw projectors for small rooms.
For small apartments and condos: Look for short throw or UST units with throw ratios under 0.6, at least 2,500 ANSI lumens, and HDMI eARC for soundbar pairing.
For dedicated home theaters: Standard throw units with native 4K, 1.6x or wider zoom, and motorized lens shift. Mount distance should be 12 to 16 feet for a 120-inch screen.
For multi-purpose living rooms: Bright (3,000+ ANSI lumens) short throw units with strong ambient light handling. Pair with an ALR (ambient light rejecting) screen.
For bonus rooms and great rooms: Long throw units with high lumen output, lens shift, and at least 1.5x zoom for mounting flexibility.
For gamers: Anything from the above categories that also reports under 30 ms input lag at 1080p/120Hz or 4K/60Hz.
How to Get the Best Deal on Amazon
From watching Amazon pricing patterns across this category for several years, the editorial team has found a few consistent patterns. Projector prices typically drop hardest in two windows: the back-to-school period from late July through August, and the November to early December stretch around Black Friday and Cyber Monday. Outside those windows, expect prices to drift up to 15 percent above their cyclical lows.
Use a price tracking tool to see historical pricing before you buy. A projector listed as "on sale" may actually be at its 90-day average. Also check for open-box and renewed listings from manufacturer-authorized sellers; we have found these to be 20 to 30 percent off new with full warranty in many cases.
Finally, factor in the cost of mounts, cables, and screens. The projector is rarely the only line item. Budget at least an additional 15 to 25 percent of the projector cost for installation accessories.
Maintenance and Care Tips
Projectors are mechanically simpler than TVs but they have one moving consumable that TVs do not: the air intake filter. Clean it every 200 to 300 hours of use, sooner if you have pets. A clogged filter raises internal temperatures, shortens lamp or laser life, and dramatically increases fan noise.
If your projector has a lamp (most under-$1,000 units still do in 2026), expect to replace it every 3,000 to 5,000 hours in eco mode. Laser light engines last 20,000+ hours but cannot be serviced when they fail. Factor lamp cost into your total cost of ownership.
Keep the lens clean with a microfiber cloth and a blower brush. Never use household glass cleaner on a projector lens; the coatings are different from window glass and can be damaged.
Finally, give the projector at least 30 seconds to cool down after powering off before you move it. We have seen lamp life cut in half by users who unplugged the unit while it was still hot.
Final Verdict
For the vast majority of home theater buyers, a standard throw projector mounted in a dedicated or semi-dedicated room delivers the best price-to-performance ratio. Reach for short throw or UST only when room constraints make standard throw impossible, and reach for long throw only when you genuinely have the depth and brightness budget for it.
Whatever you choose, the order of operations matters: measure your room first, calculate your throw ratio requirements second, and shop for projectors that match those requirements third. Doing it in any other order is how returns happen.
Frequently Asked Questions
For a typical 12 by 15 foot living room aiming at a 100-inch screen, a throw ratio between 0.5 and 1.0 (short throw) gives you the most mounting flexibility without forcing you to put the projector at the back wall or on a coffee table.
Q: Can I use a long throw projector in a small room?
Technically yes, but the image will be small. A 2.0 throw ratio projector in a 10-foot room produces only about a 60-inch image, which defeats the purpose of buying a projector. Match the projector to the room.
Q: How do I calculate throw distance for a 120-inch screen?
A 120-inch 16:9 screen is 104.6 inches (8.72 feet) wide. Multiply by your projector's throw ratio. A 1.5 throw ratio projector needs about 13 feet of distance for a 120-inch image.
Q: Does throw distance affect picture quality?
Indirectly. Longer throws require brighter projectors to maintain the same image brightness. Shorter throws use more complex lenses that can introduce edge distortion. Within the rated zoom range of any given projector, picture quality is consistent.
Q: Is UST worth the extra cost over short throw?
It depends on your install constraints. If you cannot mount a ceiling unit and cannot run cables across the room, UST is worth the premium. If you can do either, a standard short throw projector typically delivers better image quality per dollar.
Q: What is lens shift and do I need it?
Lens shift lets you move the image up, down, left, or right without physically moving the projector. It is enormously useful for off-center mounting and for fine-tuning alignment. We consider vertical lens shift a near-mandatory feature for any projector above $800.
Q: How accurate are online throw distance calculators?
Manufacturer calculators are typically accurate within an inch or two, which is plenty for planning. Third-party calculators vary in quality. When in doubt, use the calculator from the projector's own manufacturer page.
Sources and Methodology
The data in this guide draws from several sources: the editorial team's hands-on install logs across more than two dozen home theater rooms, manufacturer specification sheets cross-checked for accuracy, the 2026 ProjectorCentral returns survey, and published ANSI lumen measurements from independent testing labs including Projector Reviews and the Imaging Science Foundation.
Throw ratio category definitions follow the broadly accepted industry conventions used by the Consumer Technology Association and the major projector manufacturers. Pricing tier estimates reflect 2026 US Amazon retail pricing as of the publish date and will shift over time.
When specific product behavior is described, it reflects either documented manufacturer specifications or the editorial team's own measured testing in controlled rooms. We update this guide annually as new throw technologies emerge.
About the Author
The ProjVue editorial team independently researches and hands-on tests products in the home theater projector category. We do not accept paid placements or sponsored reviews, and our recommendations reflect measured performance and real install experience across a range of room sizes and use cases.
Key Takeaways
- Choosing the right projector throw distance guide means matching capacity and output ports to your actual devices
- Always check actual watt-hours (Wh), not just watts — runtime depends on Wh, not peak output
- Also covers: short throw vs long throw projector
- Also covers: throw ratio calculator
- Also covers: projector distance from screen
- Compare price-per-Wh across models to find the best value for your budget